
A regular check on your computer's Disk Usage(DU) is required to ensure the smooth running of your system. Having a disk working at nearly 100% disk usage causes your PC to slow down, hang, or become unresponsive. It will no longer execute tasks faster like before. In this article, you will learn how to check the Disk Usage on your system using a variety of ways.
Disk Usage and Disk Capacity
The terms Disk Usage and Disk capacity might be quite confusing to some users. Let's clarify it in a brief before proceeding.
Disk Usage (DU) refers to the amount of your computer memory currently in use. Most storage devices like Hard disk have a specific read/write speed normally summing up to between 100-150mb/s. If your drive read, write speed exceeds 100-150mb/s, and you will have a 100% disk usage, which will slow down your PC.
Disk capacity, on the other hand, refers to the total storage space available on the disk.
Tools to check Disk usage
There are several ways which you use to check and analyze the disk usage in your Ubuntu system. In this post, we shall focus on five best methods, which include both Graphical and command-line methods.
1. System Monitor
2. Disk Usage Analyzer
3. NCurses Disk Usage (NCDU)
4. DF Command
5. PYDF command
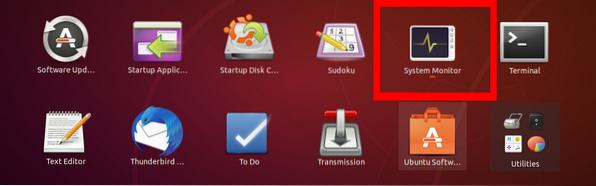
1. System Monitor
System monitor comes pre-installed in your system, and you, therefore, don't need to download any additional packages. You can launch from your Applications menu.
If the system monitor is not installed in your system, execute the command below for Ubuntu operating systems.
sudo apt install gnome-system-monitor
Apart from Disk Usage, System monitor also shows you additional information like all running processes in your system and system resources usage.
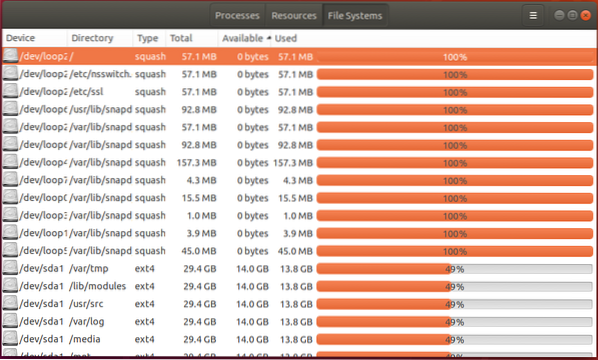
To check the Disk Usage click on the “File Systems” tab. That will display Disk Usage information in six tabs.
- Device tab
- Directory tab
- Type of file system
- Total device capacity
- Available space on the device
- Used device Space
If the Used Device Space is equal to the Total Device Capacity, the System Monitor will show 100% Disk usage, as in the image below.
2. Disk Usage Analyzer
Disk Usage Analyzer is a disk usage utility that comes with the GNOME Desktop Environment. It gives you a graphical representation in the form of a Ring Chart or Treemap chart. This tool represents what is on the disk to the user via a menu-driven graphical representation.
The powerful graphical user interface provides users with a scan feature to check specific parts of the file systems. You can scan a single folder, the entire file system, or remote directories and filesystem if you are working with a server system.
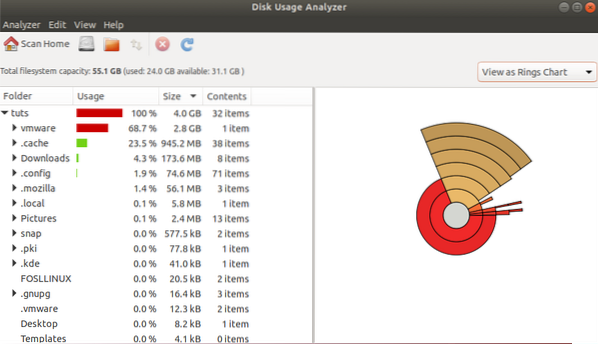
Disk Usage Analyzer lists Disk information in 4 tabs;
- Folder name
- Disk Usage - Represented by a percentage bar
- Device size
- Contents - It sows the number of items present in the device
It also makes uses of different colors to represent the Disk Usage. The red color shows high disk usage that is close to 100% with green showing low or average disk usage.
3. NCurses Disk Usage (NCDU)
It is a Disk Usage analyzer that uses a ncurses interface to present disk information to the user. It is a command-line based tool and therefore, an excellent choice for server management where you are limited to a Graphical User Interface (GUI). However, it's still a reliable tool even for the Desktop system.
NCDU does not come pre-installed like our previous tools. Click the link below to download it from its official website.
Download NCDU Analyzer
Once downloaded, you do not need to install this tool, make it executable, and run it on the command-line. From my experience working with it, copy the file on the home directory and execute it from there - but it is not mandatory. It only saves you the time of navigating between different folders.

To run NCDU, execute the commands below simultaneously.
sudo chmod +x ncdu sudo ./ncdu

Navigate through the NCDU interface using th4e arrow keys or press Q for help.
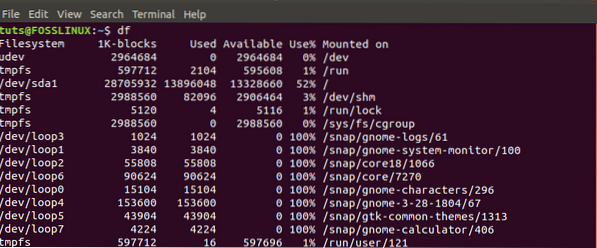
4. The DF command
DF command is a command-line tool that comes pre-installed in most Linux systems and has long been used to check Disk usage and available disk space. It supports several arguments that display specific Disk Usage information.
The basic syntax is;
df [options] [devices]
For example;
df df -h: Displays disk Usage in Human Readable Format. df -a: Show all File System Disk Space Usage.
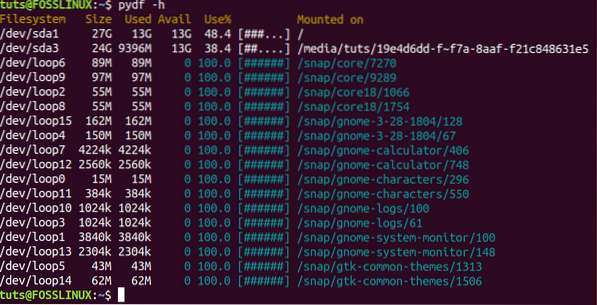
5. PYDF command
PYDF (Python Disk File System) is an advancement of the DF command, which we have discussed above. It is a python command-line tool used to display disk usage but in different colors, unlike the DF command.
PYDF does not come pre-installed in Ubuntu but can be installed with the command below:
sudo apt install pydf

Using PYDF to analyze your system for Disk Usage is easy. You can execute the “pydf” command, which Disk Usage information of all mounted file systems. You can also run “pydf -h,” which displays disk usage in a human-readable format. To list all the arguments you can use with PYDF, run the command “pydf -help.”
Those are five tools you can use to check Disk Usage on your Ubuntu system. Do you have a tool that is not listed here? Feel free to share with our users in the comment section.


