This walkthrough will cover the installation of Jenkins on Ubuntu 20.04. We will also cover the necessities to get started with Jenkins, including how to start a development server with ubuntu and signing up with an administrative user account.
How Jenkins work
To explain it simply, Jenkins automates your projects, namely their building and testing, and in turn facilitating the integration of different changes that come up with the expansion of your project's scope. It also facilitates the continuous delivery of the updated software by merging with several testing and deployment tools.
Jenkins can save your organization a lot of time and tonnes of resources throughout with its automation plugins that integrate the entire project life-cycle: build, assess, demonstrate, package, stage, and deploy stages.
It supports Windows, Mac OS as well as Linux/ Unix OS and it is distributable on different machines.
Our setup
Here in this guide, we're using an Ubuntu server using a sudo access user account, with Oracle JDK 11 installed on the server. We will use the officially updated packages to install Jenkins.
Step 1: Preparing the server
We will start by adding the repository key to the system, using the following command:
$ wget -q -O - https://pkg.jenkins.io/debian-stable/jenkins.io.key | sudo apt-key add
Then, move on to adding the Debian package repository address to the server's sources.list:
$ sudo sh -c 'echo deb http://pkg.jenkins.io/debian-stable binary/> /etc/apt/sources.list.d/jenkins.list'

Next, switch to the new repository using the following command.
$ sudo apt update
Step 2:Install Jenkins
With the server ready for installation, type in the following command to start the installation:
$ sudo apt install Jenkins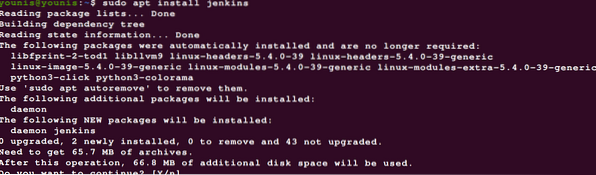
The installation could take a while. If installed from the project maintained packages, it should have all the newest features available.
Step 3: Fire up Jenkins
Type in the following to fire up jenkins:
$ sudo systemctl start JenkinsTo see the status output, use the status input to see whether the startup was successful:
$ sudo systemctl status Jenkins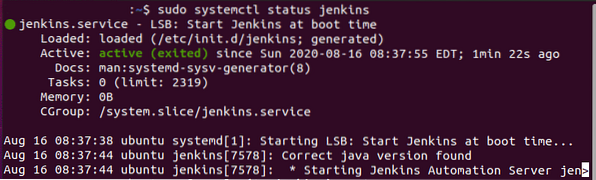
If you've been following the instructions properly so far, you should see the output the same as the screenshot above.
The output panel confirms that Jenkins is set up to start as soon as the machine boots.
Although we've confirmed that the installation was successful, we should tweak our firewall settings to link its setup from a web browser.
Step 4: Configuring the firewall
Let's make some adjustments to the firewall first. The default settings on Jenkins run it on port 8080. To access that port, type in the following:
$ sudo ufw allow 8080
This would enable the firewall if it wasn't enabled before the installation.
$ sudo ufw allow OpenSSH

Check on the status update using:
$ sudo ufw status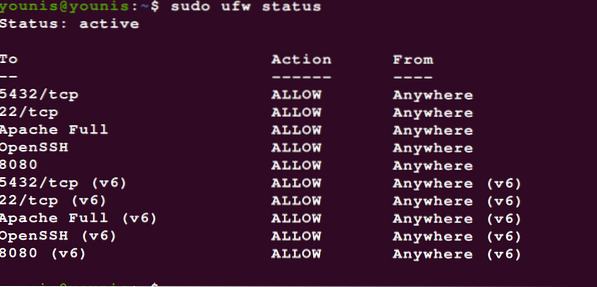
See how port 8080 is open to traffic access from throughout the web.
Now that we have installed Jenkins on our server and adjusted our firewall, we can finally move on to customizing Jenkins.
Step 4: Customize Jenkins' settings
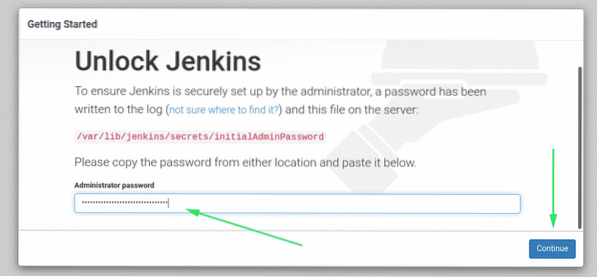
Before we set up the installer, we must access Jenkins' port 8080 with our credentials. It should take you to the Unlock Jenkins panel, where you'll see where the initial password was located.
Switch to the terminal window and summon the password with the cat command:
$ sudo cat /var/lib/jenkins/secrets/initialAdminPassword
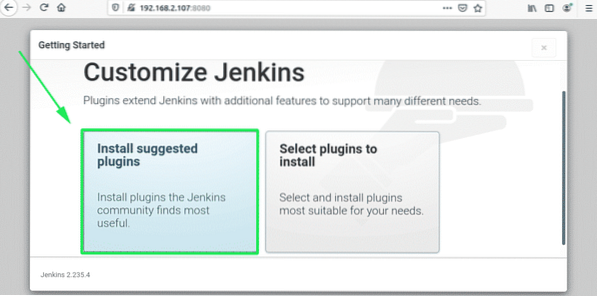
Note down or save the password displayed in the window, go to the Administrator password dialogue box and paste it there. Next, you'll be asked whether you want to customize the plugins to install yourself or go with the default plugins.
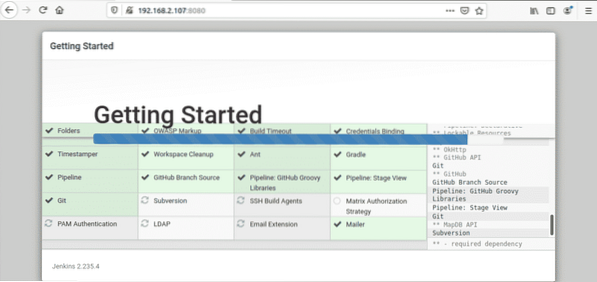
Here, we simply clicked the install button, as you can see. Once the installer finishes, it'll display a prompt where the user credentials of the admin go. You may use the password that 32-character alphanumeric password and continue as admin or create a new user as follows.
Then, you'll be displayed an 'Instance Configuration' panel, where you'll confirm the URL for your Jenkins' instance. You can confirm with either your domain name of the server, or it's IP address:
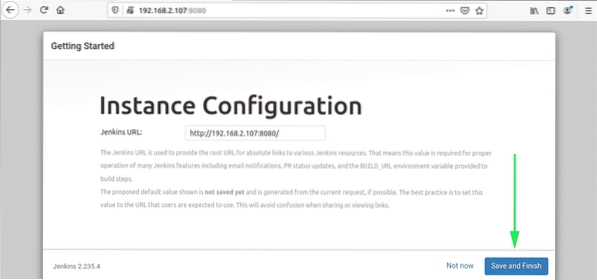
Having confirmed the required info, you may exit by clicking the Save and Finish button. You'll receive a message that says something to the following effect:
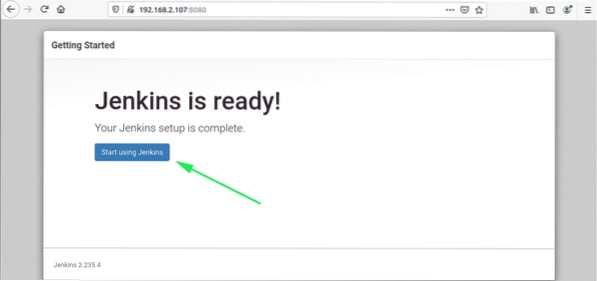
Visit the Jenkins dashboard by clicking the Start using the Jenkins button.

If you've followed the steps above properly, you should have the latest version of Jenkins installed on your system.
Wrapping things up
In this article, we've looked at Jenkins, its installation, and the necessary packages. I hope you've found this tutorial useful and that it has helped you with getting Jenkins up and running on your Ubuntu 20.04 server.


