Jupyter is a web-based interactive development tool that helps create the environment to share live codes, virtualizations, and interactive data. As the name describes, it is a notebook that includes computer code and text.
Jupyter is flexible and extensible that can support Python, Julia, Haskell, and many other programming languages. Many other plugins can be added with the existing plugins to add more features and they are compatible with usage. This guide is about getting Jupyter on Ubuntu 20.04, let's check step by step procedure to install it.
How to Install Jupyter notebook on Ubuntu 20.04?
To install Jupyter, first, we need to install pip3, which is a Python Package Installer. For this, update all of the installed packages using the update command:
$ sudo apt-get update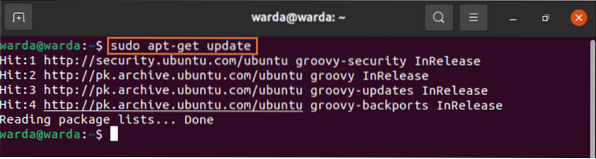
Use the following command to install pip3:
$ sudo apt install python3-pip python3-divAs Pip3 is already installed on my system, we'll move forward towards the pip upgrade command:
$ sudo -H pip3 install --upgrade pip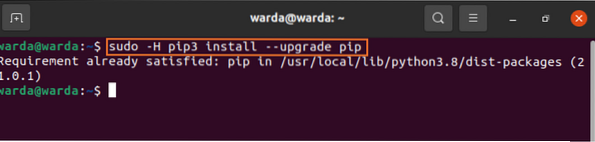
Now, to create a virtual environment, use the command given below:
$ sudo -H pip3 install virtualenv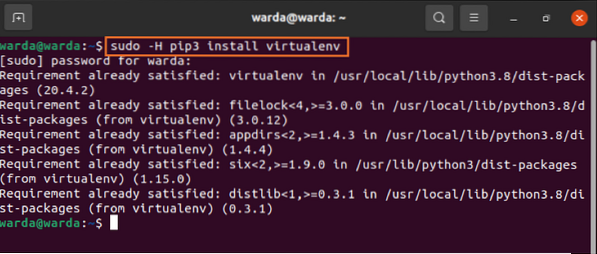
Virtual-Environment package has been installed on the system. The next step is to make a directory for virtualenv:
$ mkdir jupyter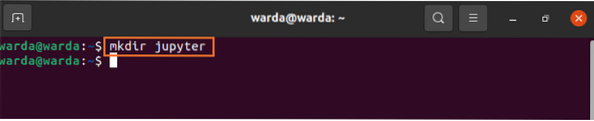
Change directory to make project files in it:
$ cd jupyter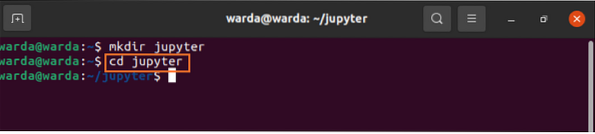
As you can see, the directory is created and changed. Now, create a Python virtual-environment in this directory, the environment name is “environment”:
$ virtualenv environment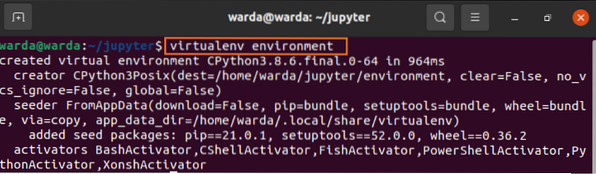
I have created an environment in the Jupyter directory. Before installing Jupyter on the system, we need to first load created virtual-environment.
Use the following activation command “/bin/activate” to activate it in terminal:
$ source environment/bin/activate
As all of the above requirements are completed to install Jupyter. Now, type the given command in terminal to download Jupyter in a virtual-environment:
$ pip install jupyter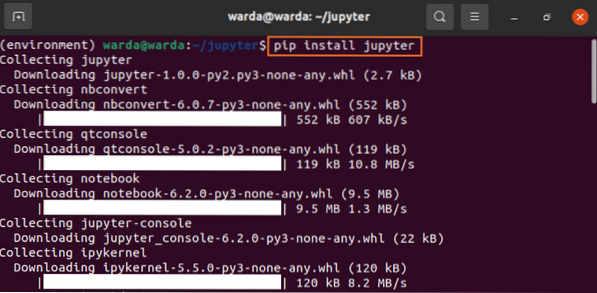 Jupyter will be installed on the system, to run it, type the command mentioned below:
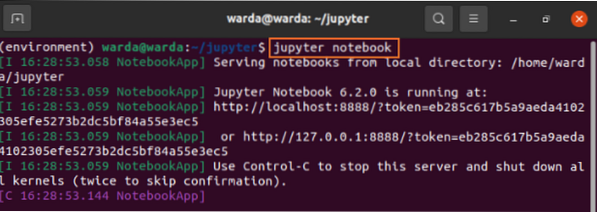
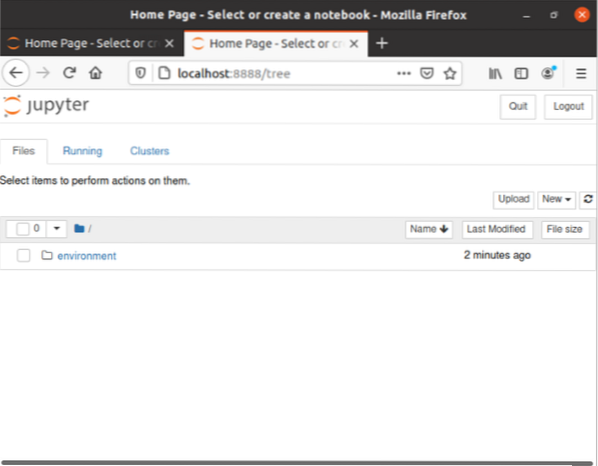
Jupyter notebook will be opened, as depicted in the following image.
Conclusion:
We have learned from this guide how to install Jupyter notebook on Ubuntu 20.04. Jupyter notebook is a web interactive tool used to share and present projects, computer code, texts, visualizations, and data. Remember that it is not only important to learn a programming language but to also share data.


