This article will show you how to install Krita on your Ubuntu 20.04 system. The article will also provide a view of some important aspects that make Krita useful to work with.
What is Krita?
Krita is a free and open-source photo editing and digital painting application. Although it is mainly built for KDE Plasma, Krita also has versions for Windows and macOS, making it a cross-platform software. Krita is a fully-featured digital art studio that, despite a very minimalist UI, offers users many powerful features. Features include an advanced brush engine, non-destructive layers and masks, support for multiple image formats and color patterns, and so much more.
Krita also contains several tools that aid users in creating their designs, like blending, smoothing, layering, color mixing, and so on. It comes by no surprise, therefore, to see it being used in the professional filmmaking industry.
Installing Krita
Ubuntu offers multiple ways for users to install Krita on their computers. The next sections will take a look at some of these installation methods.
a) Installing Krita with a Snap
One simple way of installing Krita on your system is by using a Snap. Snaps are packages, recently developed by Canonical, that allow users to install an application on any distribution of Linux without undergoing an error due to the software not being supported.
To install Krita using the Snap store, open the terminal by hitting Ctrl+Alt+T or by searching in the Ubuntu Dash. Then, enter the following command inside of it:
$ sudo snap install kritab) Installing Krita with the PPA Repository
Because Snaps are still not very stable, many users still opt to install applications by using their PPA repositories. To install Krita using your PPA repository, you will first need to add Krita to your system, which can be done by running the following command:
$ sudo add-apt-repository ppa:kritalime/ppaNext, update your system by running the command below:
$ sudo apt updateFinally, enter the following command to install Krita onto your Ubuntu system:
$ sudo apt-get install kritac) Installing Krita with the AppImage
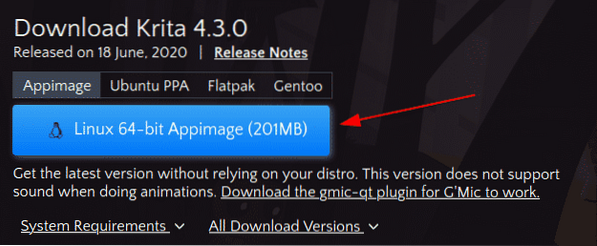
For users who do not want to go to the hassle of building applications for dozens of distributions, they can use AppImage to install applications that follow a similar installation routine to what we do in Windows and macOS. To install the AppImage of Krita, go to the official Krita website and click the “Download” section.
Next, click the AppImage file, and this will download Krita onto your system.
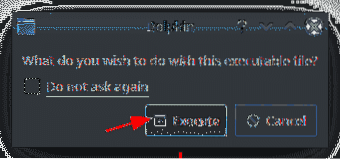
To run this file, you first need to make it executable. To do this, open the directory where the AppImage was downloaded and run the following command:
$ chmod +x ./*.appimageNow, double-click on the AppImage, select the “Execute” button on the prompt, and Krita will start.
Using the Krita Editor
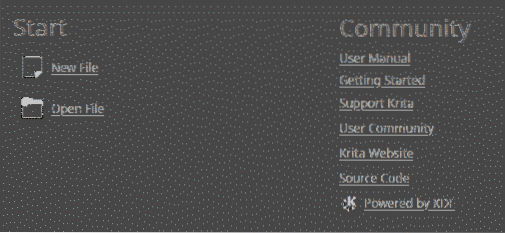
Krita provides users with an extremely user-friendly interface. The interface layout can easily be customized by moving things around in the workflow. When you start Krita, the first thing that you will see is a window asking you whether you want to create a New File or, if you want to open some specific file, to select Open File. This window also provides you links to some community-based pages.
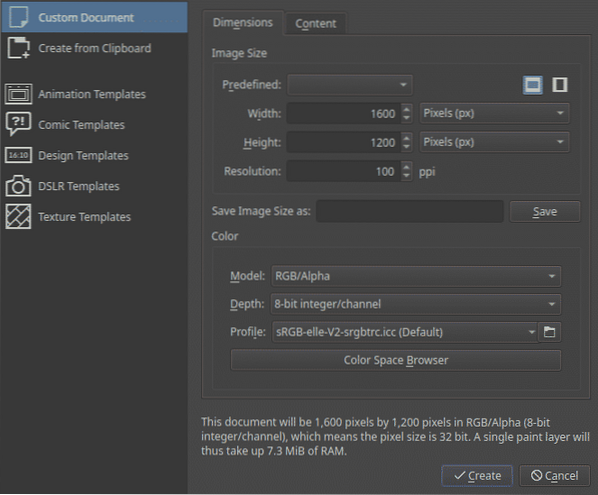
If you opt for creating a new file, then you can set up either a custom document or create it from a clipboard. In both cases, you will have to specify the height, width, and resolution of your file. You can also use different templates that come along with Krita for your file.
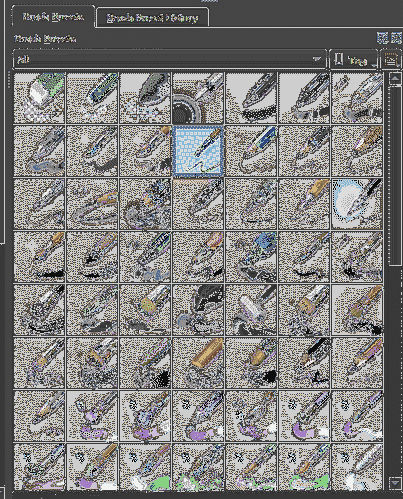
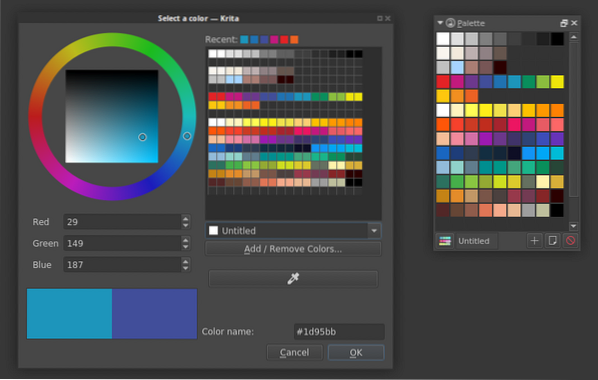
Krita provides you with a range of brushes and erasers, along with a color palette that you can use to assist you with drawing.
Brushes and Eraser Set:
Color Palette:
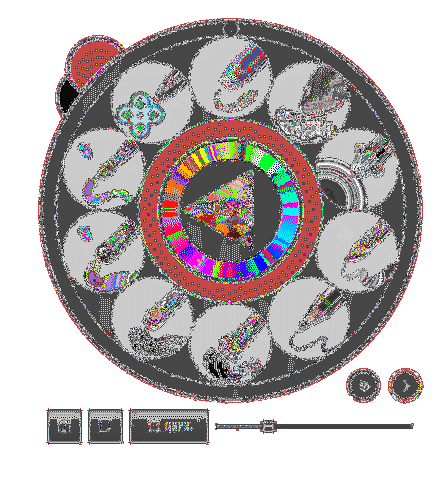
For quick access to some of the tools frequently used by its users, Krita also provides a Pop-up Palette, which is one of the best features to come along with it. You can easily access this by right-clicking on the canvas:
In addition, Krita also has some editing tools, such as a rectangle tool, a line tool, and so on. Below, we used a combination of the calligraphy tool and edit shapes tool as an example:

Quite a fine work of art, if I must say.
That is the gist of some of the basic features that Krita has to offer.
Why Use Krita?
Krita is a free and powerful painting software developed by KDE. It offers numerous features that make it ideal for digital painting. Effects and filters for image processing, textures for rendering, vector art support, and support for layer management are only some of the features from the long list that Krita possesses. It is therefore no wonder why Krita has emerged as one of the favorites of many visual creators and 2D/3D Artists.


