Browsing files and folders has never been problem in recent versions of Windows operating system. The new Windows Explorer or File Explorer introduced with has been significantly improved in Windows 7 by introduced Libraries as well. The toolbar displays back, forward, create new folder, open with share with, burn and some other options deepening on the file type you selected.
The search box located in the upper right is more powerful than ever. Microsoft has improved both Start menu search and Explorer search with a number of features in Windows 7.
The navigation pane (left pane) present in the Windows 7 explorer features libraries, favorites, computer and network locations. This pane comes in handy to quickly navigate between drives and folders also lets you add your favorite folders to Favorites for quick access.
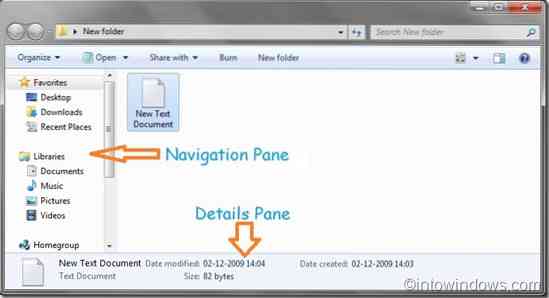
Windows 7's Details pane displays a set of file attributes such as file name, size, type and other information depending on the file type.
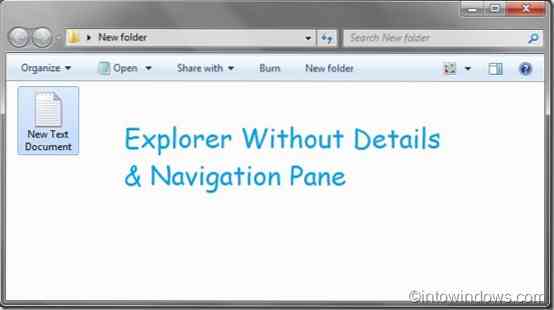
Even though both navigation and details are great for quick navigation and view brief information about selected file, users who don't use them frequently may want to disable them. Also users who're running on a computer with a small screen may want to disable the details pane to get more screen space. In this guide, we are going to show you how to easily hide both details and navigation pane in Windows 7 without using third-party tools.
Related: Get Windows 8-style Ribbon UI in Windows 7 Explorer.
If you would like to disable or hide the navigation pane for some reason, here is how to do it:
Step 1: Open Windows explorer.
Step 2: Go to Organize > Layout and then deselect the option named Navigation pane.
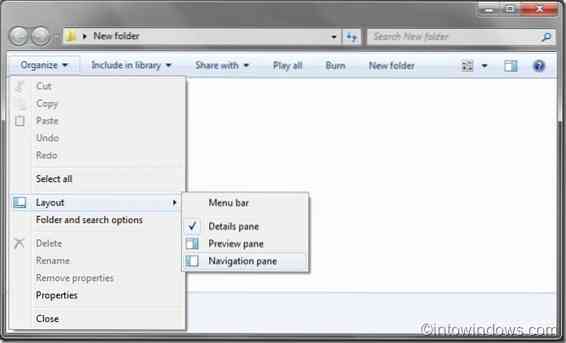
Step 3: You are done.
To disable/hide Details pane:
Step 1: Open Windows explorer.
Step 2: Go to Organize > Layout and then deselect the option named Details pane.
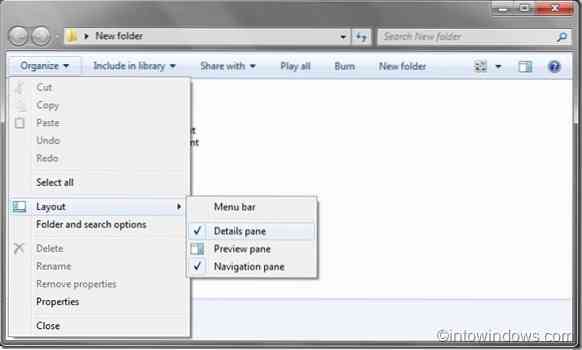
Step 3: That's it.
If one of your PCs is running on Windows 8, don't forget to check out How to enable Windows Explorer toolbar in Windows 8.


