Nessus is Openvas' father, it is not free anymore (that's why OpenVas was created) and i'll write this tutorial using the Free Trial version of Nessus Professional for Ubuntu and show you how to install Nessus and get started with its usage.
Acquiring Nessus:
Click here to access the Nessus' website to get the trial code to install Nessus.
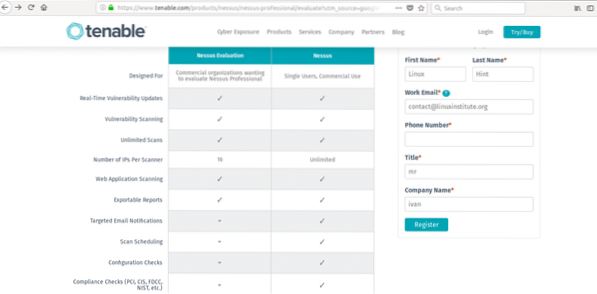
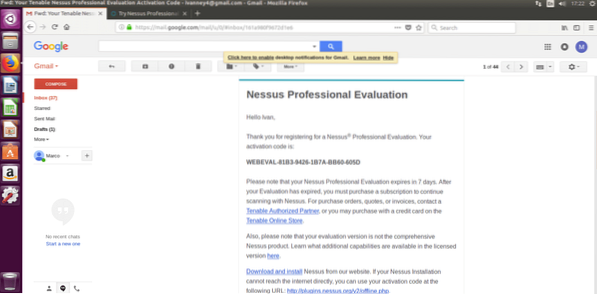
Fill the form to get your trial code by email, click on the “Download and install” link.
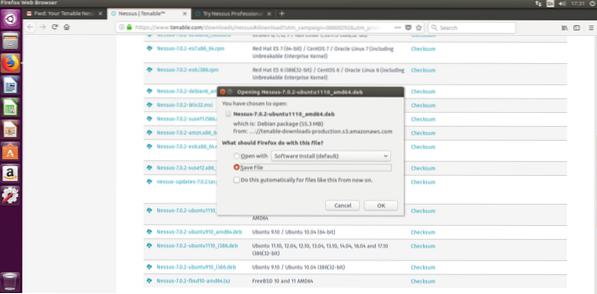
After returning to Nessus' page you can select the proper version for your test, I'm using Ubuntu 16.4 therefore I'll download Nessus-7.0.2-ubuntu1110_amd64.deb. Select your version, accept the license terms and download.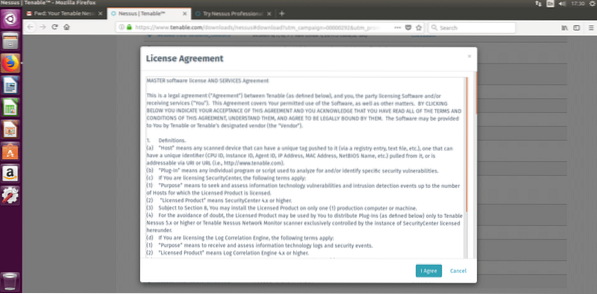
Installing Nessus
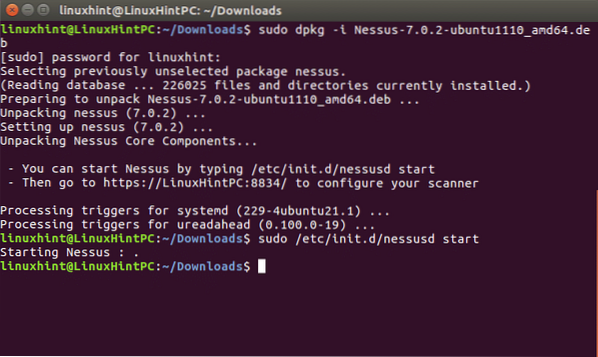
Installing Nessus is very easy, specially if you have read our tutorial on DPKG packages manager.
Run:
sudo dpkg -iAnd after the installation is done follow the instructions by running:
sudo /etc/init.d/nessusd startYour terminal should show very similar results to the following:
Following Nessus' installation instructions lets go to: https://YOURPCNAME:8443 (change YOURPCNOW for your computer's name, works with localhost too).
When opening the Web interface, a SSL error may appear
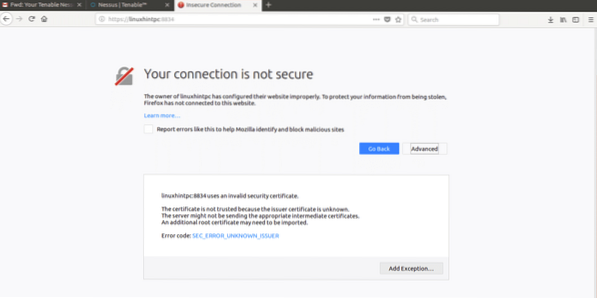
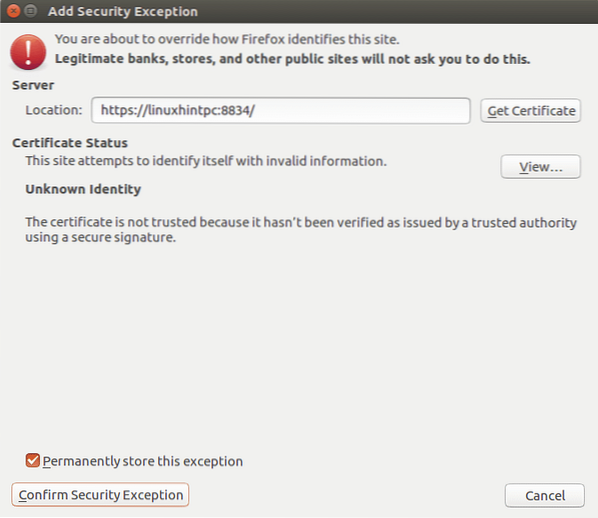
Just add an exception and continue accessing:
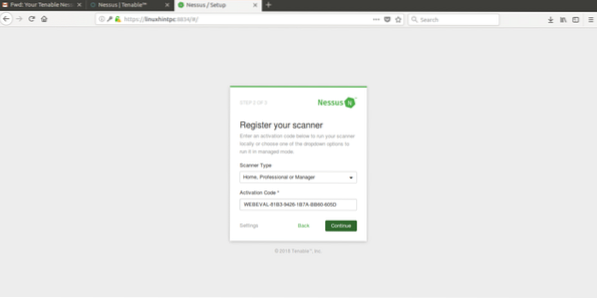
Finally we'll meet Nessus' screen, login using “admin” both as user and password.
In the next screen select the use you'll give to Nessus and put the trial code you got by e-mail.
After filling everything Nessus will start initializing as shown in the next image, this step may take about 20 or 30 minutes, after finishing the next screen will be:
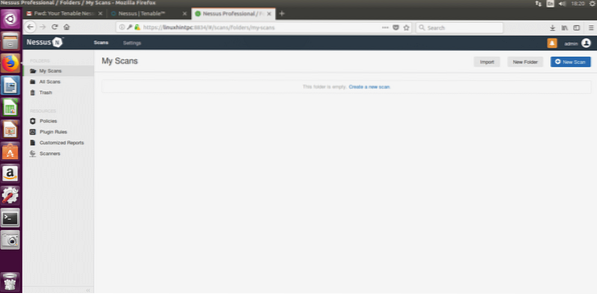
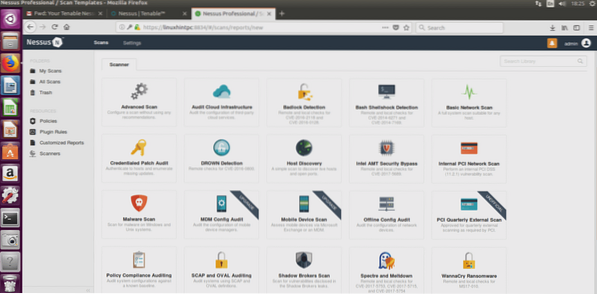
In this screen we'll intuitively select “create new scan”, Nessus will ask you what kind of scan you want, lets choose Advanced scan, the first option:
Now a form will ask for the information about our target:
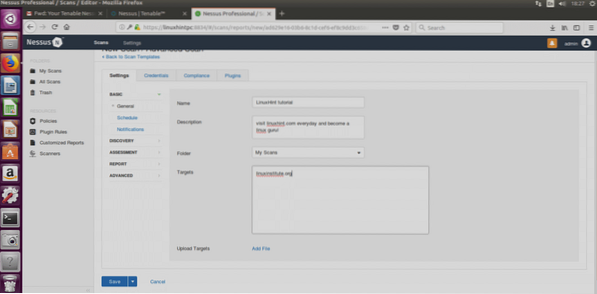
Fill it freely, pay attention to write a proper target's address,click on save and lets check the rest of options:
Discovery Host
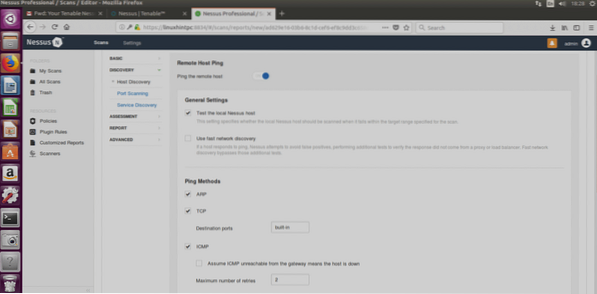
ARP: This option is useful only within local networks and will use the mac address instead of the IP address.
TCP: TCP will ping using TCP protocol instead of ICMP protocol.
ICMP: Normal ping to discover hosts.
Assume ICMP unreachable from the gateway means the host is down: If chosen, Nessus will consider targets which don't reply to ping as offline.
Below in this window there is the UDP option too (the screenshot didn't cover it).
In order to understand the differences between the protocols mentioned I encourage you to read the Nmap tutorial which includes an introduction to the protocols.
Port Scanning
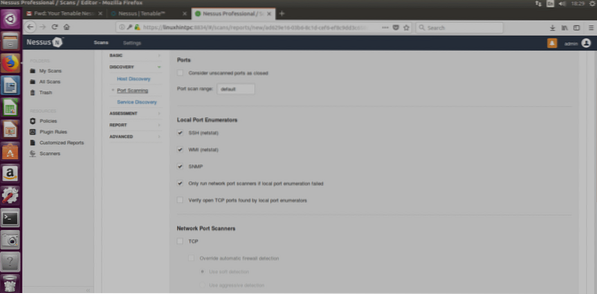
In this section you can edit all ports settings, port ranges, etc.
SSH (Netstat): This option will work only if you provide login credentials. Nessus will run the netstat command from the target system to discover open ports.
WMI (Netstat): Same as above using a Windows application, this option will work only against a Windows target (while the SSH only on Linux systems).
SNMP: Scan through SNMP protocol.
Verify open TCP ports found by local port enumerators:checks if ports locally opened are reachable remotely too.
Network Port Scanners: You can choose the intensity of the scan
Service Discovery
 Nessus is Openvas' father, it is not free anymore (that's why OpenVas was created) and i'll write this tutorial using the Free Trial version of Nessus Professional for Ubuntu and show you how to install Nessus and get started with its usage.
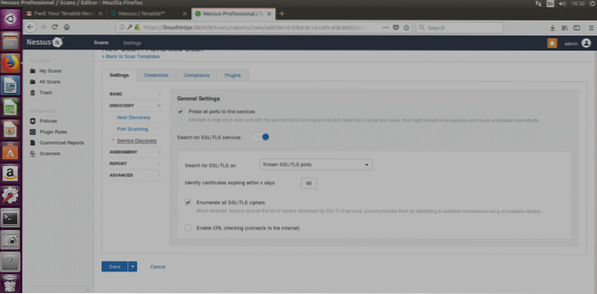
Probe all ports to find services: This option will try to find the service of each scanned port.
SSL: This is about checking the SSL safety. Many SSL vulnerabilities were reported but I don't know about any which was really exploited remotely, and if I'm not wrong safe SSLs can be tricked with sniffers in local networks, I would ignore this.
ASSESMENT
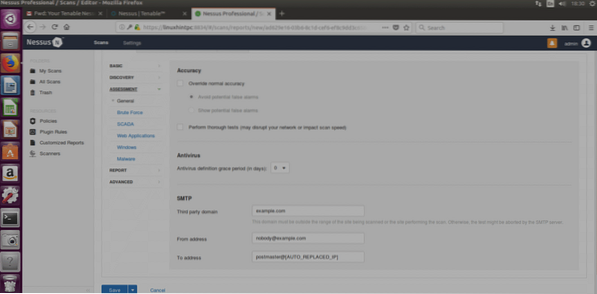
Bruteforce: will try to bruteforce credentials, this option allows to integrate Hydra.
SCADA:
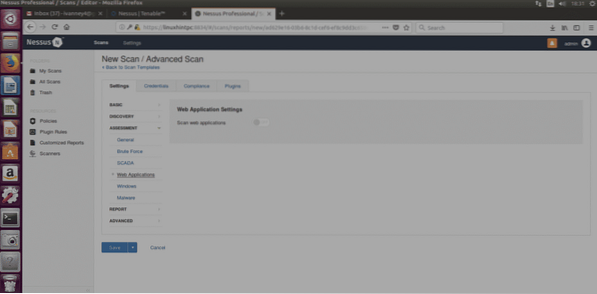
Web Applications:Allows us to scan websites including crawling, SQL check and a lot more.
Windows: Use this option for Windows targets.
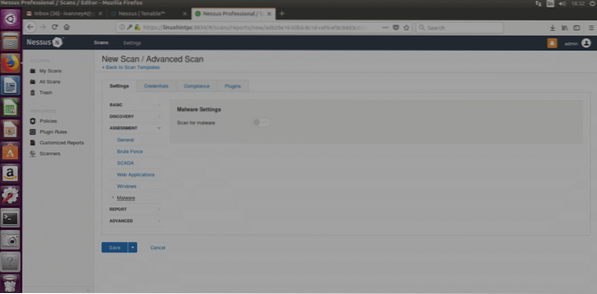
Malware (again): Will scan for malwares.
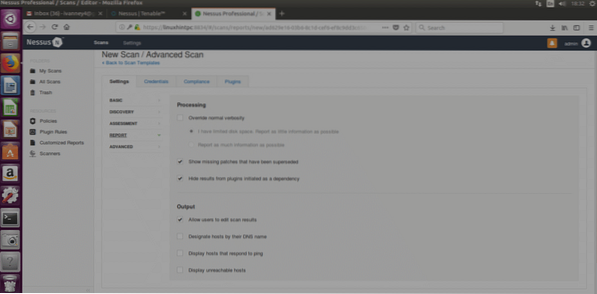
REPORT
This section specifies how we'll handle results, you can choose a variety of options which wont affect the scan itself, you can choose to show targets by IP or domain name, editable properties of the reports and more.
ADVANCED
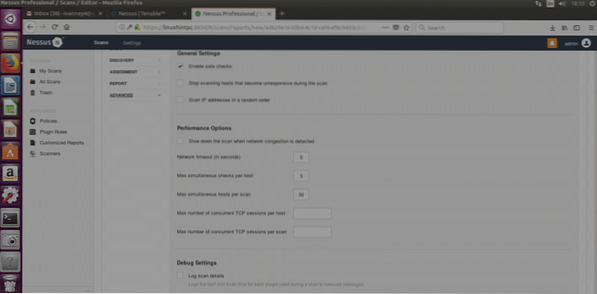
Safe Check: Nessus will perform a less aggressive scan collecting information through banner grabbing (information unintentionally provided by the target's system, NOT PISHING).
Performance Options: Here we can define how many vulnerabilities can Nessus check simultaneously, or how many targets, or the timing interval.
LAUNCHING THE SCAN
Save the configuration you decided before and the next screen will prompt:
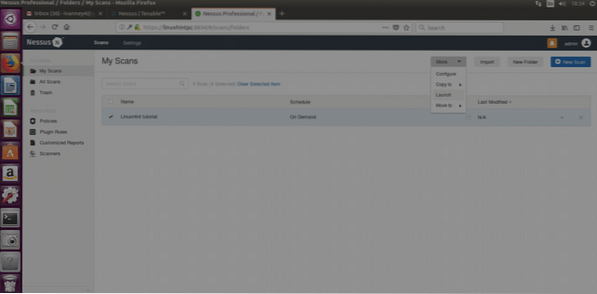
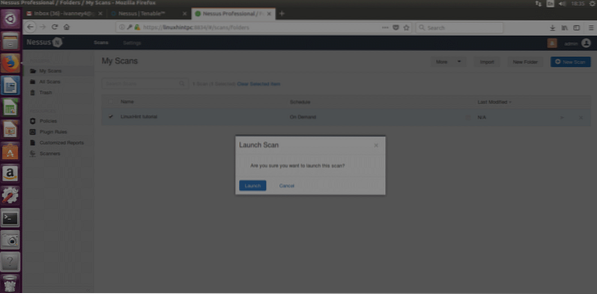
Select your scan and then click on More (right side on the site's top) and “LAUNCH” and when asked, confirm the launch by clicking on the blue button “Launch”
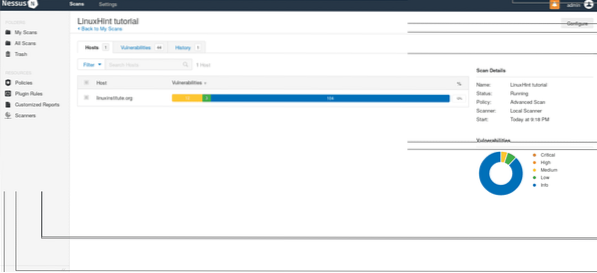
Nessus will start scanning:
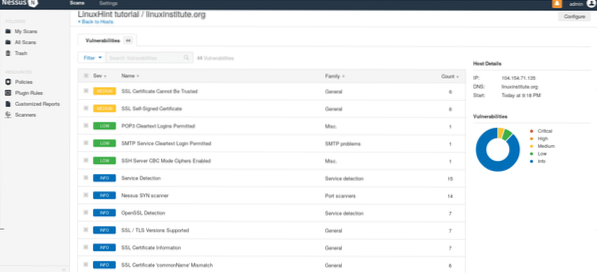
After it finishes, click on your scan and a window showing the results' quantity will appear, click on the colored bar to see the results.
I hope this introduction tutorial will get you started using Nessus and keep your systems secure.

